 tangzily
Floor plan editor
Draw rooms and place tables, counters, and zones.
Who can use this
Editing requires business settings access.
Instructions
- In Tables, open Edit plan. Start with a template or add objects individually.
- Set object dimensions and seating capacity. Enable grid snapping for alignment and use the zoom controls to inspect the plan.
- Save the plan and return to the working view. If another session has saved a newer revision, load it before editing again.
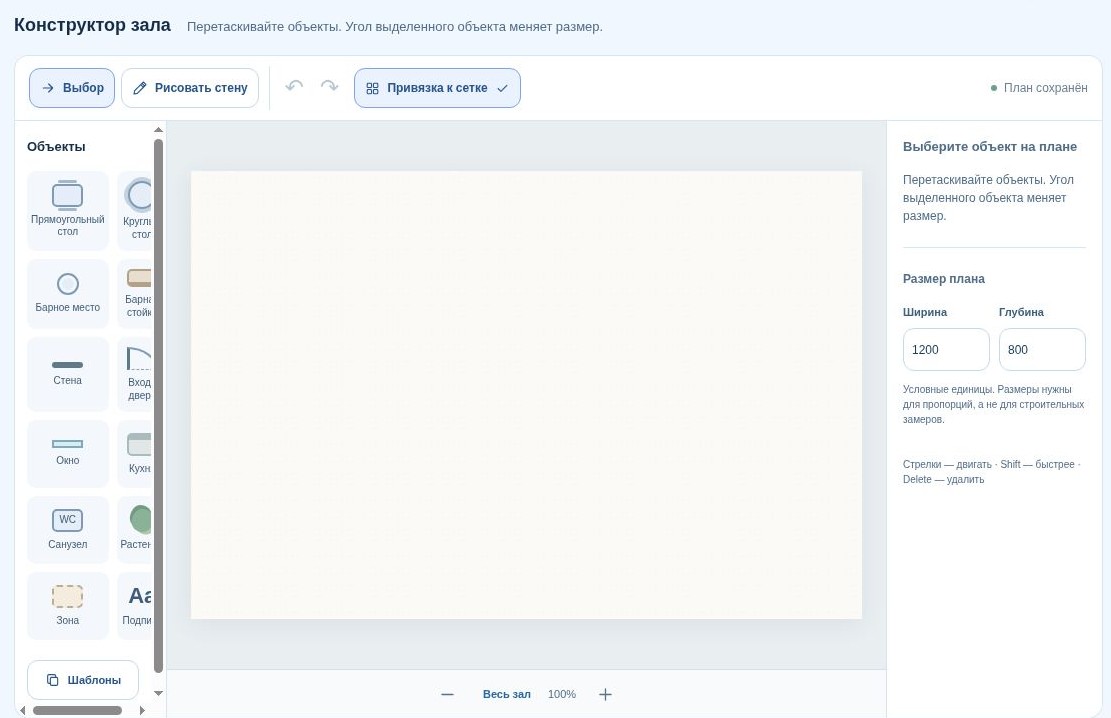
Buttons and fields
- Edit plan / Templates
- Enter the editor and choose a starting layout.
- Rectangular table / Round table / Bar seat
- Add a selectable place for service.
- Wall / Door / Window / Zone
- Add layout elements for staff orientation.
- Select / Draw wall
- Switch between selecting objects and drawing a wall.
- Snap to grid
- Align objects on grid increments while moving them.
- Name / Width / Depth / Seats
- Set the selected object’s label, dimensions, and number of seats.
- Rotate / Duplicate / Delete
- Change the orientation, copy, or remove the selected object.
- Undo / Redo / Fit floor
- Revisit recent local changes or fit the canvas to the screen.
- Save plan / Load latest
- Publish the plan or reload the current server revision.